
Wails is a framework that enables development of desktop applications using the Go programming language.
In this article, I will provide an in-depth look at the initial project structure when a new Wails application is created. By examining this structure, you will better understand how Wails operates and what the development cycle entails.
Installing Wails
Install Wails using go install.
$ go install github.com/wailsapp/wails/v2/cmd/wails@latest
Initialize new golang wails project
Now that wails cli installed, create a new project using wails init.
$ wails init -t vanilla -n wails-hello-world
This will create a new folder wails-hello-world with the following project strcuture.
─── wails-hello-world/
    ├── build/
    ├── frontend/
    ├── .gitignore
    ├── app.go
    ├── go.mod
    ├── main.go
    ├── README.md
    └── wails.json
Run the project
From withing the project folder, run wails dev and you should see the following application pop up.

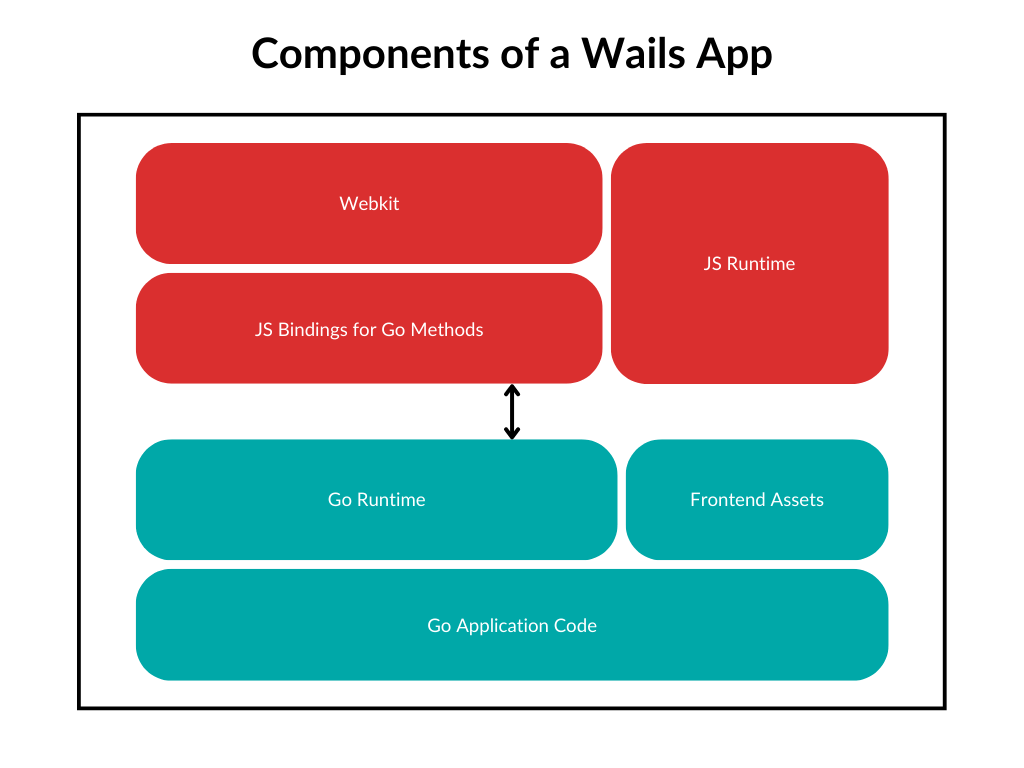
Overview of Wails Architecture
To fully grasp the inner workings of Wails, I strongly suggest reading the “How does it work?” section of the official Wails documentation.
Wails is primarily composed of two parts: a Go runtime and a Webkit engine for displaying the frontend. Yes, the frontend of the application is written in JavaScript.

Wails generates bindings between Go and JavaScript, making it easy for you to invoke Go code from the JavaScript side.
Here is a more detailed diagram at Wails’s official website.
